Showing posts with label Barbie craft project. Show all posts

Sunday, January 11, 2015

How to Repaint Barbie Furniture The Basics


Tired of all the pink plastic mass produced furniture for fashion dolls? Like the details of a piece but dislike the color?  Don't discard it, transform it!


It is quite easy to update a piece of Barbie furniture to suit your needs.  Now I am not saying that my way is the only way, but I have been repainting Barbie furniture for 10 years and this is the process that I have found works best for me.  In the above scene I customized the red sofa quite simply with two colors & some embellishment. 

I started with the purple chaise from the My Scene Chelsea Getting Ready Playset:


Then I gathered my supplies:
  • Drop cloth or cardboard box for painting 
  • Spray Paint for plastic
  • Rubbing alcohol 
  •  Plastic furniture to be painted


Step 1: Separate your furniture into pieces if it is applicable. Many sofas, tables, beds are made with pieces that can be removed such as the legs or seats of chairs. It's easiest to paint the individual parts-especially if you are trying to paint them different colors.  In the example above I removed the legs so I could paint them silver.


Step 2: Clean your furniture. If you are not buying the item new give it a good scrub with some hot soapy water & let it dry thoroughly.


Step 3: Wipe everything down with rubbing alcohol. This removes any soap residue and ensures a good adhesion with the paint. Let it dry .


Step 4: Prep your paint area with drop cloth or cardboard to catch the overspray. I like to use an empty cardboard box.


Step 5: Paint! Make sure you follow the directions on the can. Keep the can far enough away that you avoid drips. Light coats work best!


Step 6: Multiple coats. For best results let each coat dry at least 20 minutes before the next coat. Don't add coats after 24 hours. I have found that the paint will bubble if you do. It should be fully painted within a few hours of when you start.


Step 7: Let paint cure for 7 days before handling too much. I have found that this is key to prevent paint scratches or chipping off. I know it's hard to WAIT!!


Step 8: Enjoy the fruits of your labor!!


I generally do steps 1-3 a day or two ahead of time. That way I can make sure everything is dry & ready to go.  Tip: Do NOT spray paint outdoors on a windy day. Not that I have ignored my own advice or anything. **Ahem.  All I will say about that is wet paint attracts every particle in the air. But I digress.


You can achieve some really terrific results using just two colors of paint.

That's it!! Super simple. Time consuming.  Exhilarating. Empowering!

Now, I'd love to see what pieces you transform!!! 

Thanks for stopping by and as always,

Happy Crafting!
Stephiejo

Thursday, November 14, 2013

Reader Question: What Material Can I Use for Walls in a Barbie House?


Hello my lovely blog readers!!!  I can hardly believe that the holiday season is upon us once again.  It has been a whirlwind of a year. I won't bore you with all the details but I am BACK with ideas to share!  Thank you all who emailed me asking if I was planning on returning to the craft room.

A reader by the name of Rhonda recently sent me an email after discovering my fun little blog.  She is constructing some condo units for her dolls using shelves & was wondering if using cardboard would make the finished project cheesy. 

First of all, kudos to you for your vision, your energy to tackle this project & brilliant idea to use readily accessible inexpensive materials to create a charming space for your dolls.  Many miniaturists use non-wood materials to create backdrops in miniature scenes. I personally find that it is much easier to work with and I do not need specialty tools.  I am an instant gratification kind of girl so this works for me on so many levels!


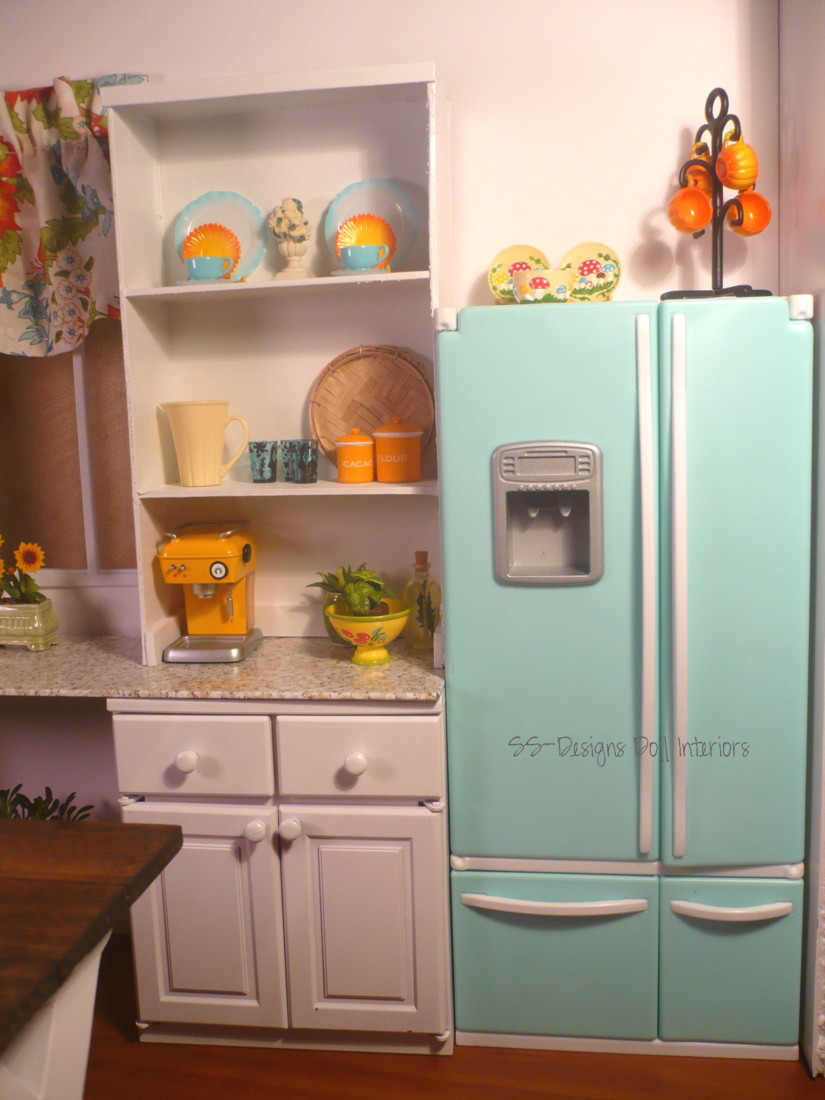
In addition to cardboard, one of my absolute FAVORITE mini wall surface is FOAM CORE.  The picture above is a quaint breakfast nook scene that I created with foam core.  It is light weight, inexpensive, and found at most Hobby stores (even at my local dollar store!).  The window that you see...shhhh...I'll tell you a little secret. You know the pre-school MATCHING card game? When you get a set new you have to punch out the little cards. What is left is a piece of cardboard with evenly spaced squares that resemble a multi-pane window! Add a little wood trim & a window sill & you are DONE. 

I use foam core extensively to create backdrops for my photography.  I cover in appropriate scale wallpaper or scrapbook paper to transform the space into a realistic setting.

 I even use it to build furniture. It really is quite versatile & creates a sturdy alternative to wood.  The upper cabinets in the photo below were constructed out of cardboard & trimmed with wood.


And the countertop. It's cardboard. Wrapped in faux granite contact paper. Bah-bam!


This entire Chicago Bears Themed room was built with cardboard.  I even created faux stones with recycled egg cartons. (tutorial to come)


You can either glue the edges together to form your walls, use T-pins or even duct tape to secure the corners together.  Even better-use the walls to create some architectural interest. Add in a closet, a bay window-complete with a seat, a fireplace or any other structural element to help reinforce the wall to allow each one to be free standing within the shelving unit.  


I also like to use old Barbie boxes to add a niche to an otherwise flat wall.


The beauty of constructing a dollhouse in this matter is that it is flexible. You can move the walls around without having to dismantle the entire thing. How is that for ultimate creativity? Could you imagine being able to do that in your real house? I know I LOVE to rearrange furniture, décor & artwork frequently. Having the ability to do so in my mini projects is a MUST.

I really want to thank Rhonda for reaching out to me. I am thrilled you found my blog and are INSPIRED to create your own fabulous rooms! As always I love pictures! If you would be so kind as to share your project once you are finished I would be thrilled. I enjoy seeing the creativity my readers produce. You all are so talented! I am humbled that I inspire you to get creative with your doll spaces, but truth is you all inspire me as well!

Thank you for stopping by

Happy Crafting!
Stephiejo

Wednesday, June 29, 2011

Barbie Craft Project: Farmhouse Table


Super simple craft project. Inspired by a recent trip to a fabulous little craft store where I found some fun little 3-D letters made out of MDF. This cute little table popped into my head and I knew I had to have them. 


A little nod to Pottery Barn farmhouse style.

Supplies:

3-D Letter X (2 of them)
Wooden Dowel
Pine Craft Wood
Wood Glue
Paint
Stain
Wood sealer
Craft knife
Drill / Drill bits


Step 1: Find the center of the X.


Step 2: Drill a hole in the center of the X large enough to allow the dowel to pass through.


Step 3: Determine the length your dowel needs to be to support the two x's. To figure the length out I set up the x's and set the pine board on top. I left about a quarter inch overhang on each side, marked the dowel and cut to length.


Step 4: {Optional} I wanted my table top to look like boards rather than a solid piece of wood. I divided my wood into three sections with a pencil. Then score over the pencil lines with a craft knife be careful not to cut all the way through.


Step 5: Stain the tabletop (both sides so it doesn't warp). Or if you prefer you can paint it or leave it natural.

Step 6: Glue the dowel in place. Allow to dry thoroughly and paint the entire table base.

Step 7: Seal the tabletop.

I left my tabletop separate from the table base for ease of storage. You could attach yours if you wish. This particular table is just a smidge taller than an actual Barbie table so if you do not have any chairs that fit it you could use it as a kitchen island.

Here's my new Barbie kitchen. A tutorial on that project in the near future.


Linking to Transformation Thursday @ The Shabby Chic Cottage


Thanks for stopping by!
Happy Crafting!
Stephiejo

Wednesday, June 15, 2011

Barbie Craft Project: Tile

Quick and easy project that has a multitude of possible applications. There are a variety of ways to create scale tile, this is one method that I use frequently.

Supplies:


Thin cardboard (scrap from a notebook, cereal box, or scrapbook tablet)
Xacto knife or scissors
Ruler
Mod Podge
Paint Brush
Pencil
Scrapbook paper,  contact  paper or wallpaper in suitable pattern (example: granite, marble, solid, wood, stone)

Step #1: Lay your scrap of cardboard on top of your piece of patterned paper. Trim paper just slightly larger than the cardboard.


Step #2: Apply a thin layer of Mod Podge to the cardboard. **Note-Mod Podge is waterbased and will cause the cardboard to warp slightly. This is ok.


Step #3: Lay your patterned paper face down on your work surface. Place the cardboard on top of the paper-glue side down.  Press down firmly with your hands. Start in the center and work your way to the edges to remove most of the air bubbles.


Step #4: Place a stack of magazines or heavy books on top until the glue dries. This will flatten out the cardboard.


Step #5: Trim the excess paper to the edge of the cardboard using a straight edge & sharp xacto knife or scissors if you can cut really straight.

Step #6: Draw a grid on the back side of the cardboard the size you want your tiles. I made mine 2 inches by 2 inches. This will equal a real life 12 inch square tile.  **Hint-look at websites that sell tile for size & design ideas.  1" x 1" = 6" RL tile, 2.5" x 2.5" = 18" RL tile


Step #7: Cut along your grid lines. Voila you have tiles!


This will make a fantastic backsplash for a kitchen, a great floor or fabulous surround for a fireplace. 

Here is one example of this tile used in a Barbie sized setting. I customized a vintage Sears kitchen fashion doll playset and added my own backsplash:


Thanks for stopping by!

Happy Crafting!
Stephiejo

Wednesday, June 8, 2011

Barbie Craft Project: Toilet Paper Holder and Towel Holder


Super fast-super easy-craft project for the crafting impaired. Scouts honor. Actually I am sharing TWO. You will be done with both in less than 30 minutes.

Project #1: Toilet paper holder

Supplies- small paper clips- bead caps or rounded earring backs, super glue, wire cutter and real toilet paper (can you spare a square?)


Step 1: Open your paperclip into a U shape


Step 2: Trim the paper clip so that it is the appropriate depth (about half inch)


Step 3: Glue small end of bead caps or earring backs to each end of the paperclip - let dry

**(I do this step on top of wax paper to avoid gluing my tp holder to my work surface)

Step 4: After the glue dries cut a strip of toilet paper just slightly narrower than the width of the holder and wrap around to create a miniature roll.

Step 5: Glue the tp holder to the wall


Now for the big question..does your roll fall over or under? That is such a hotly debated issue in my house...for realz...like it's serious or something...but inquiring minds want to know!

Project #2: Towel Bar

Supplies: Wooden skewer, variety of plastic beads, 2 cup hooks or similar product for hanging, craft knife, craft paint, spray paint or paint pens, matte sealer (optional)


Step 1: Determine the length of your towel holder and trim skewer (mine is 3 inches)

Step 2: Glue beads to each end of the skewer. It doesn't matter what color they are as you will paint the entire piece.


Step 3: When beads are thoroughly dry-paint with craft paints, spray paint or paint pens in desired finish.

Step 4: Seal paint (optional)

Step 5: Hang in your space with appropriate sized cup hooks. (paint to match if necessary)


Step 6: Add towel-finished! (I use felt trimmed with coordinating ribbon. Fold felt in half & iron so it hangs flat on rod)

A few more pics of my Silkstone bathroom...


If you are going for a more realistic approach you could just crumple up the towel and leave it on the floor underneath the towel bar...but that's only if you have men in the house....just saying....

Sweet and simple! Enjoy your handiwork~

Stephiejo ♥

Non-Traditional Barbie Furniture Ideas

In my last post, I discussed my top five favorite mass produced doll furniture pieces for Barbie & friends. (in case you missed it clic...